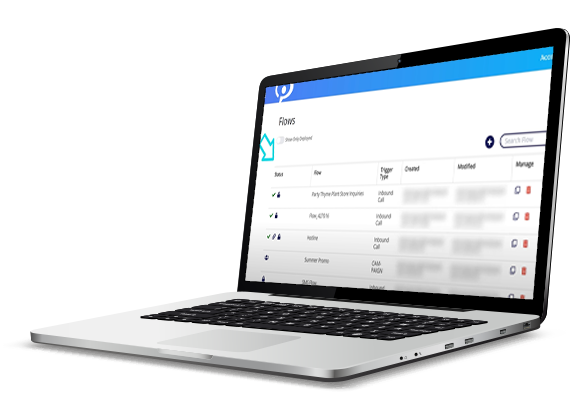
First up is the Flows page. Here you can build a new flow and interact with previously created flows. Flows created by others on your account are also listed in the flows table. You can adjust the table to only show deployed flows using the toggle at the top of the page. Use the search box to find a specific flow. You can search by Flow ID, Flow Name, or the User ID of the person who created or modified the flow. In the Status column, key flow details are represented by icons. You can see if a flow is private or shared, if a number has been assigned, and if the flow has been successfully deployed. From the Manage column, you can copy or delete a flow. To build a new flow, click the blue plus sign button. You can choose to build your flow from scratch by clicking New Flow, or use a pre-built Template.
Now let’s jump over to the Audio Library Page. Audio files added to any of your flows are stored in the Audio Library. Here you can upload new files or interact with previously stored audio files. Audio files uploaded by others on your account are also listed in the table. Use the search box to find a specific audio file by File Name. In the Manage Column, you can play an audio file, edit the File Name, download the file to your computer, or delete the file. Once you’re ready to add a file to the Audio Library, click the Choose File button. Select a WAV audio file from your computer and click the Upload button to save your file to the library. If you chose a file by mistake and don’t want it to be uploaded, click the Reset button instead.
Last, but definitely not least, is the Assignment, or Number Assignment, Page. The Number Assignment page is where you can view your phone numbers and manage their use in flows. Here you can assign a number to a flow, search for a number, view current number assignment details, and remove numbers from flows. Numbers associated with your account are listed in tables, organized by category. Each category has its own tab at the top of the page. Use the search box on each tab to find a specific number under that category. When you click the checkbox next to a number, the Assign Flow and Clear Flow buttons appear above the table. Use the Assign Flow button to add the selected number to a deployed flow. Use the Clear Flow button to remove the selected number from any previously assigned flows. If you select multiple phone numbers from the table, the digit in the green circle next to the Assign Flow and Clear Flow buttons will update to indicate the amount of phone numbers selected.
Now that you know the lay of the land, you’re ready to build your first flow! Go back to the flows page and click the ‘New’ button to get started. For more information about SmartFlows, or other Atmosphere products, check out our Platform Documentation.
